Wednesday, February 26, 2014

Bonsai Lesson

The $500 bonsai I want.....

 A couple of weeks ago, I went to a bonsai (pronounced bone-sigh) demonstration at a garden center. What does bonsai mean?- Plantings in tray,- from bon, a tray or low-sided pot and sai, a planting or plantings. It was amazing  to see how a bonsai is shaped from the beginning to the end. 


Don't ask me why I love him!
 Okay, on to the demonstration. (I apologize for the quality of the pictures.)

The tree before
  The garden center owner demonstrating the technique, has over 900 plants to pot up and shape into bonsai, as a large shipment had just arrived.  It was unbelievable how quickly he could do this. Practice makes perfect!
The first thing he did was determine which side was going to be the front of the bonsai, and how  it was going to sit in the bonsai pot. The table he is using spins so he can look at all sides without moving around the table umpteen times. A table top lazy-susan would work for the non-bonsai professional.

Figuring out how to situate the plant.
The second thing he did was strip all the leaves off the plant (yes, all of them) so he could see the branch structure. Everyone in the audience gasped when he started ripping all the leaves off. This is a ficus, so they will grow back quickly, but it was shocking to see, all the same. 


He began trimming any branches he felt were unnecessary, which consisted of most of them. When cutting and choosing branches, he told us to choose alternating branches, not opposite. Branches look better in an alternate pattern. Make sure you have large branches on the bottom and smaller branches as you get closer to the top. Bottom branches should also be longer than branches at the middle and top. Then, he began to wire the branches. He has to begin training the plant into the shape he wants it to become while the plant is young and pliable. This is were the artistic vision comes in. One has to have a vision of the tree in the future. Look how different the tree looks already in the picture below. Use your imagination and it looks like a full grown tree, leafless in the winter. The wire should be checked every 1-2 months. If it is allowed to scar the bark, it will always have those scars. The wire will have to be loosened, or more likely, it will have to be re-wired. (Sorry about the boxes and things in the background. I really took all these pictures so maybe I could do this sometime, and then decided to share them with you.)


The wired tree
After trimming all the superfluous branches, he removed the tree from the grow or nursery pot, and removed all the soil from the roots. He used what looked like a small hand cultivator to scratch all the soil away from the root ball, leaving the roots hanging bare.This plant really has had a traumatic day! Leaves ripped off, branches cut, soil removed,  roots chopped......

Determining the container
Next. he had a couple of containers he thought would work and picked the one that the tree and especially the trunk of the tree, looked proportionate in. The bottom branches should barely extend past the rim of the pot. He then trimmed the roots to fit in the pot, cutting off more than 1/2 of the roots. This will not hurt the plant as he removed all the leaves and most of the branches. The roots don't have a lot to support anymore and the root hairs will recover in tandem with the leaves as they grow back.

Placing the tree in the container
Notice how far the soil was up on the trunk of the tree. That soil is removed so the root flare will show in the finished bonsai. It makes the tree look more grounded and old, which is the point of bonsai. The holes in the bottom of the container are covered with mesh so the soil doesn't fall out.  After placing the soilless tree into the container, it is tied into the pot with waxed cotton string. He secures the root ball to the container, threading the string through the holes. Without tying the tree in, it would fall out. The material used to anchor it, will eventually rot after the plant is rooted in firmly.

Working soil in with chopstick. (Sorry blurry)
He filled the container about 1/2 full and placed the tree on top of  it. After placing some of his special bonsai soil on top of the root ball, he uses a chopstick to help work the soil down among the roots of the tree. The soil doesn't need to be shoved down into the  roots, but worked gently down among them.

A last trim
  After settling the soil, he trims all the ends of the branches to force them to sprout more leaves and it will help the leaves grow in smaller in size. Many times when purchasing a bonsai at a big box store, you will find sheet moss or glued rocks on top of the soil. These things should be removed so you can see the soil. Many times you can tell whether a plant needs water by just looking at the color of the soil. The lift test works well also. After watering, lift your plant. This weight is what you should go by when lifting it a couple of days later. If it is much lighter and the color of the soil is different, it is time to water it again.
Soaking the finished tree in a bucket of water
Notice the amount of branches left and the shape of the tree. Soon, the leaves will grow back and the tree will start to take shape.

Finished bonsai Shefflera arbicola


Bonsai used as a tree in a fairy garden


Small Bougainvillea bonsai


When you get your bonsai home, you need to place it in an East or North window. A South or West window can be too hot and watering would become a huge chore. You need to check your plant everyday for water, and fertilize regularly, as the soil usually has no nutrient value and needs to be fed.
These artistically shaped trees are amazing and I am definitely going to try my hand at this.


Crested form of Euphorbia neriifolia


Bougainvillea bonsai

Sunday, February 23, 2014

Houseplants Add Pizzaz!

As I perused the orchid show displays yesterday, I was happy to see they were using houseplants to enhance their displays. They mixed well with the orchids and filled in the bare spots. Corners were softened and pedestals were anchored to the bare floor.


In the display above, they used a Monstera to soften the corner and two Dracaena marginata were used to fill the spaces between the bottom row of orchids. 

Here an eyelash begonia, Begonia bowerae was used for some color and pattern. Above it is a burgundy bromeliad which matches the color of the patterned leaves of the begonia. They really have an artistic eye! The sheet moss is used to hide the grow pots of all the plants. The green color really helps make a cohesive display. 

How amazing is the striped leaves of the Aechmea bromeliad above? Tucked under the top pedestal to disguise it is a creeping fig, Ficus pumila 'Curly'. On the top shelf a prayer plant, Maranta leuconeura peeks out from under the moss.

On the floor to anchor the pedestal and soften it at the same time are 3 plants with sheet moss. Included is a bird's nest fern, Asplenium nidus, a begonia and another Maranta.
The houseplants only added to the displays and made them more professional looking and artistic.  

Saturday, February 22, 2014

A Welcome Relief from Winter


Blc. Paradise Jewel Flare
I have been staying with my Mom this week in mid-Michigan. Yesterday we watched as her rural road fill up with blowing snow. The wind an snow was crazy! As the day wore on, my hopes of going to Lansing, which is over an hour away, were slowly being crushed under a mountain of snow. 
I woke up this morning thinking I was going to be snowed in here all day. And then, I heard the snow plow and you've never seen anyone get ready so fast. I was beyond excited! 
As I walked into the Michigan State Plant and Soil Science Conservatory the warmth and intoxicating scent of orchids was just what I needed. I'm sure every other person that walked through that door had the same feelings. It has been an extremely hard, long winter here in Michigan. 
I hope the following pictures uplift you and make your winter blues a little more bearable. It sure lifted my spirits! Enjoy! 
Miltonopsis 'Andrea West'

Denlindleyi
Blc. Toshie Aoki 'Pizzaz


Dendrobium Comet King 'Akatsuka'


Paphiopedilum Fanaticum


Judged display


Sales table/big trouble!


Odm Michael Newman x Joes Drum

Cirr Elizabeth Ann 'Buckleberry'


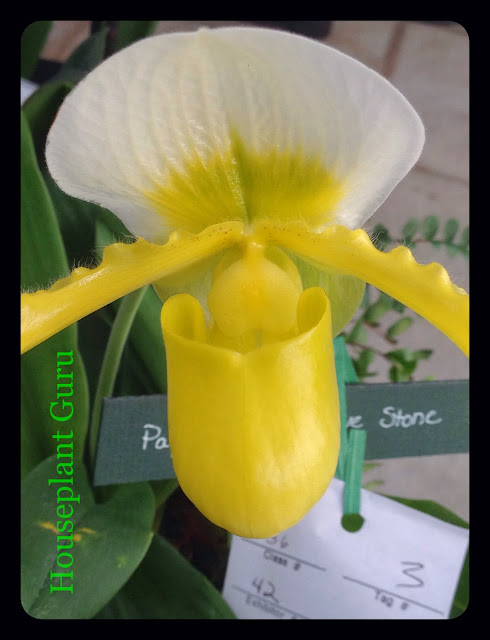
Paphiopedilum Avalon Love Stone

Chiloschista sweelimii

The orchid above has a flower that is only about 1/4" across. I loved it! 

Rhyncholaeliocattleya Ishpeming

Phrag. (Nicholle Tower x Hanne Popow)

Rhymcholaeliocattleya Ports of Paradise
'Emerald Isle'
Of course, this orchid was one of my favorites. It is green!
Brs. Rex 'Sakata' x longissima 'Starfighter'
Isn't this an amazing orchid? What a blossom spike!
Here is a closer pic of it.

Aliceara matthias
Paphiopedilum Madison River
As I was taking a picture of this amazing blossom, a little boy walked up with his grandpa. He asked if an insect would go down in there. He kept repeating himself, looking for an answer his grandpa didn't have. "Does an insect go down in that, grandpa? Why?" I love when children show an interest in plants. Orchids are a great way to get boys especially, interested in plants. They have crazy shapes and wierd pollinators. One of the displays had a lego theme. There were a couple of little boys taking pictures of that display.  I also saw a lot of college age kids there. It so heartening to see young people showing an interest in plants.

Paphiopedilum Liemianum
I love the hairy edges on these petals. Why are they there? I should have asked. 
Bnfd. Gilded Tower
Paphiopedilum sanderianum
Look at the length of the petals on this orchid! Amazing! And the picture below looks like a person with a hat and a hand on their hip. Do you see it? 
The "hairs" on this one looks like a spider. 
Paphiopedilum fairrieanum
Dendrobium Angel Moon
I so needed this day today. It was so fun and educational. I sat through three classes. One was about buying an orchid, the next about re-potting orchids, and the last one about Phalaenopsis care. Taking classes from people who grow many orchids in their own homes is THE way to learn about orchids. "Straight from the horse's mouth" as they say. I really love all houseplants and learning all I can about them. No one ever knows it all, and certainly not me!